Photo and digital tips courtesy of Michael Craig
![]()
|
Using a digital format has a different set of considerations than using film. This is a short list of some the differences and options when using a digital camera. First, you have to figure out what you are going to do with the picture. Picture display via a computer monitor takes very little resolution and file size. Getting a good print of the file takes a bit more and any enlargement takes quiet a bit of memory to achieve the resolution needed. Part of the charm of using digital is that after the initial cost of the camera and memory chips, you are essentially shooting for free. Instead of taking one shot of a particular formation, you can indulge yourself and shoot several. It's helpful to shoot both vertical and horizontal formats for use later. You can use "Std .JPG" format for monitor and Internet
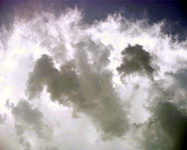
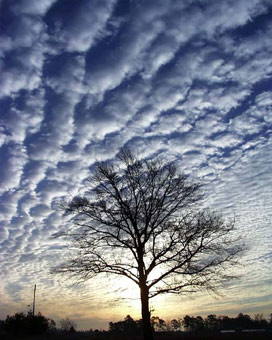
display. This takes the least amount of memory. Filters can be used, but are not as critical when using a digital camera. This is because, with the use of software, you can made your adjustment's after the fact. Focusing can be a challenge with digital cameras, especially entry level, first generation machines and those using an LCD screen as a view finder. Most digital camera have an automatic focus feature which can give you fits when trying to capture low contrast cloudscapes. If at all possible, you should set the focus to "infinity" if you have that option. A work around is to focus on the most distant object ( I use the horizon) that the camera will lock onto. This is normally done by depressing the trigger half way, then with the distance locked in, go back and compose your shot. One of the neatest artistes of digital imagery is that it often times reveals more than you were able to see with the naked eye. It's akin to viewing the sky then throwing on a pair of polarized sunglasses. On newer generation camera's, you have the ability to simulate film speed (ASA 100, 200, 400 etc.). Try to use the lowest number possible as with the higher numbers and their corresponding quicker shutter speeds, you tend to pick up artifacts (they look like dust particles) on your pictures. Once you have downloaded your files to your computer, then you most likely you will need to adjust the picture to accurately reflect the image you captured. This is because the camera will reserve enough space on the file to capture the entire spectrum possible. Often times, the extreme ends are not used. Therefore when you adjust the file to reflect only the values your recorded, you get a much better picture. To do this, I use Adobe's PhotoShop and immediately go to Image/Adjust/Levels. Often times you get excellent results using the automatic adjustment feature. However other times this will adjust the color's to appear too intense, then you are better off using the manual controls to sort things out. After you are satisfied with that adjustment, you can add some "snap" by working with the brightness/contrast options. There are several of these type of photo editing programs on the market and many of the digital camera's come with one. As I stated earlier, shooting both horizontal and vertical shots pays off later when you can substitute your beautiful sky's for ho-hum ones in photographs. I have included a couple of examples to illustrate. Raw File is how the picture looks coming out of the camera. Often times it's pretty blah, owing to the low contrast. Manual Level adjusts it back to the way it looked in the view finder. In manual mode, you really have a lot of leeway to get the picture to your liking. Auto Levels can often times give the picture a very interesting treatment. Then other times, it blows the color or contrast off the scale.
Addition thoughts for consideration: After recently trying to help salvage some overexposed film prints, I reflected on the immediacy of digital, where you can receive instant confirmation of your exposure via an on-camera LCD display. Although not a true measure of the shot, it's close enough to know if you have the picture and whether or not it's in the ballpark on the exposure. At the same time, I was reminded of digital's inherent shortcomings when it comes to display. The problem there being the sophistication of the display monitor. A file viewed on a 15" monitor w/2 MB of VRAM is a far different image than one seen on a 17" model w/64 MB VRAM. There is also the difference between the Mac and PC's monitor output, with the Mac being brighter. This difference is not usually recognized by the neophyte digital camera user. Many a treasured file has been sent winging it's way on the web only to receive pro forma praise back. The budding digital photographer is left to wonder why his picture isn't recognized for the magnificent work it is. I mention this because cloudscapes can be wondrously subtle. Unfortunately, depending on the equipment, a lot of this low contrast image goes unseen on a computer monitor. Prints are still the preferred medium I believe, due to the consistency of the display. At this point, film provides a better print. While medium to high end digital cameras can rival this quality, it is at the expense of enormous memory demands. Guess this just proves the maxim; " there is no free lunch". Michael Craig |
![]()
Clouds and Cloudscapes | Digital Photography
![]()
![]()
All Rights © Copyright John A. Day, 1998 - 2007
Site Design by DoubleRich Design
Last updated on: